20 Top Tips From The World’s Best 3D Artists

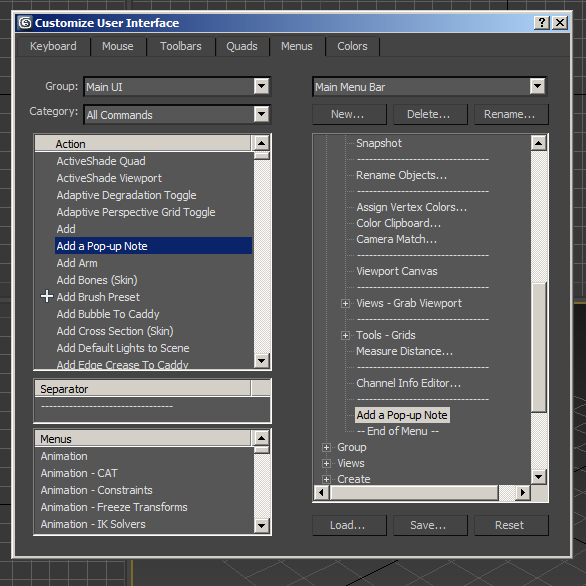
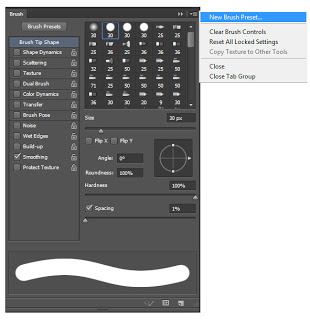
With 3D being an ever-changing landscape it can be difficult to know where to start.

I have been working in the industry for 10 years now and during that time I have been lucky enough to claim as friends and mentors some of the most talented 3D artists in the world.

Through this post I wanted to share some of their knowledge and wisdom with you, so if you are starting out in 3D, or simply have an interest in the subject, read on for 20 Top Tips from the cream of the crop.

I asked two questions:

1. What do you wish you knew when you started 3D?
2. What top tip can you share with us?


Here's what they said:


Ismail Rebbane

What do you wish you knew when you started 3D?

One day, not long ago, I decided to start a website to share what I learned. To my surprise, it was me who started learning! The best way to learn is by sharing what you learned. It just forces you to document everything in a simple process, It works like magic, try it.

What top tip can you share with us?

As you already know, CGI, in general, is cool! Just by watching a new show reel that just comes out, or a software update can lead you to change you focus on a new topic! One of the things I regret is that I didn't focus on one area, I was learning VFX, sculpting, scripting, Visualisation etc.. you name it! the result was mediocre work. It's only when I started focusing on one industry that I improved. For me it was 3D Visualisation. You can always learn more topics, but one at a time.


Klaas Nienhuis

What do you wish you knew when you started 3D?

I didn't really start in 3D. I did it on the side and then that part of my work grew. I find it pretty difficult to find a good piece of advice. For me, being very specialized has worked out great but only with a solid network to collaborate with. I think I wish somebody had told me to put more effort in a good network of friends and businesses while specializing my skillset.

What top tip can you share with us?

The second part is easy, my top tip is to learn programming. Even if it's just a little bit. The stuff you can do with simple one-line scripts in 3ds Max is way more powerful than having a big toolbox of downloaded scripts.


Neil Poppleton

What do you wish you knew when you started 3D?

Its all about enjoying the learning experience and ride.

What top tip can you share with us?

Be good at time management etc, but the best tool i have used almost every week for the past 17 years is PSD manager. A golden tool.


David Houston

What do you wish you knew when you started 3D?

When I started out I wish that Pinterest was available, its such and invaluable resource for collating project information, research and advice from other artists. Being able to share resource globally helps a great deal in planning and developing a project from a lighting and composition perspective.

What top tip can you share with us?

My best tool I use and probably my biggest hack now is a script called find and bind, it aligns any sun to the hot spot of an hdri in an instance. It also allows you to physically rotate the dome light and that automatically shifts the light position in both your dome light map and also your environment map. 


Patric Verstraete

What do you wish you knew when you started 3D?

The best way to start in 3D is to get as much software as you can and play around with it, until you find the one which is best for you. I didn’t do that, I started with 3ds max. At that time it was 3ds Max 6 with the disks! So it was really hard to make progress because there weren’t any tutorials, or very few. So I started to learn it by myself.

Then go onto the web and join forums, find tutorials, get in touch with people and share your work and ask for feedback. It is important to get extra comments on mistakes that you don't see, and last but not least, never give up!

What top tip can you share with us?

Some plugins that everyone needs in 3D Visualisation ...
Forest Pack: Forest Pack does away with all the hassle by providing not only the scattering tools, but also large libraries of photorealistic trees and plants.

Rail Clone: Generate complex parametric objects including fences, stairs and floors faster than ever before.

Vray render-engine: I started off visualising using Mental Ray, but once I gave V-Ray a go, I never looked back.

Of course there are many scripts available, but the most important to me are ...

Floor Generator: This plugin will let you create individually boarded floors, perfect for wooden floors.

Image Composition Helper: Automatically visualise the Rule of Thirds inside the 3ds Max Viewport to instantly improve the look of both your 3D static renders and animation.

Relink Bitmaps: Easily relink missing files like bitmaps, VRayMeshes, Mental Ray proxies and VRayHDRI when they change directories or when you move computers.


Dimitar Gongalov

What do you wish you knew when you started 3D?

I would have liked to know - what is the best software to produce the most realistic images. What is the shortest way to super realistic images (is it modelling, texturing or lighting) I found that the order is light setup then texturing and finally modelling.

What top tip can you share with us?

My top scripts I cannot work without are...

VMC Script: I use this every day.

Turbo Reverse: For remodeling some ready made models.


Paul Roberts

Surprisingly Paul, Training Manager at iToo Software said.. 

"use RailClone and Forest Pack, it'll make all your dreams come true!"


Matt Guetta

What do you wish you knew when you started 3D?

When I begun I was always doing everything in the renderer. I've never been a 'Photoshop guy' but I really wish I knew how to uses passes, 32b exr etc. to use compositing to improve/edit my images. Would save me tons of render times and probably makes my life easier.

When I begin 3D I was mainly doing stills, now I'm mainly doing movies. From the beginning I've always worked with the idea of doing stills as I'll handle movies (no stamp, only mattes rendered etc.) and I really recommend doing all you can in that spirit.

Using a movie pipeline for stills will really help you to improve your workflow and makes your render better!

What top tip can you share with us?

In the past few months I've switched to ArionFX (Nuke/AE/PS) It lets you do a really nice Tone Mapping in post-production after tons of layers/passes adjustments. I really love this little plugin :)


James Dowling

What do you wish you knew when you started 3D?

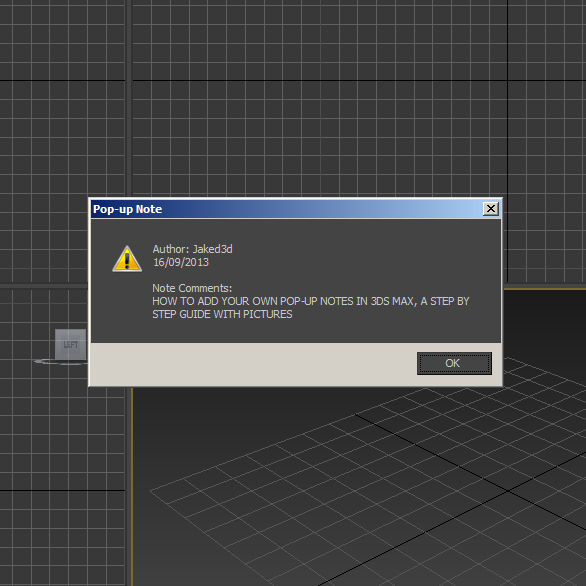
Putting useful things in the quads so you have them one click away. Some I have in mine are, insert loop, centre pivot to object. Copy and paste from file.

Change the space bar shortcut from 'selection lock toggle'. When I first started 3D Max I always hit it by accident and spent the following hour trying to work out what had happened.

Double clicking on an edge selects the whole loop.

Right click on any modifier and enabling Off in viewport to make your scene more manageable to navigate.

What top tip can you share with us?

Cleaner script for sorting out ClampTex and deleting Link Composites from imported CAD. ClampTex and Link Composites can kill loading and render times. 


Eldridge Felder

What do you wish you knew when you started 3D?

If I go back to starting off in 3D, I would have focused more on learning how to Unwrap. Today I have a much better understanding of it, and actually really enjoy unwrapping. But when I started it was something I found confusing. But now looking back at my beginner models, I could have pushed them a lot further if I had a better understanding of clean unwrapping. I also have a much better understanding of modeling and texturing as well, but I think unwrapping is very important.

What top tip can you share with us?

Depends on what is being created and the end user's experience. For pre-renders I would say V-Ray, Multiscatter, and Grow-FX could be all you need for really nice complex interior or exterior renderings. Phoenix FD by Chaos Group comes in handy as well when Fire or Water effects are needed.


A massive thank you all of the awesome artists that contributed to this article. I would love to hear your answers in the comments below.

Tools Mentioned

Hey, I'm Jake. I am a 3D Visualisation Render Artist and CGI Consultant. 

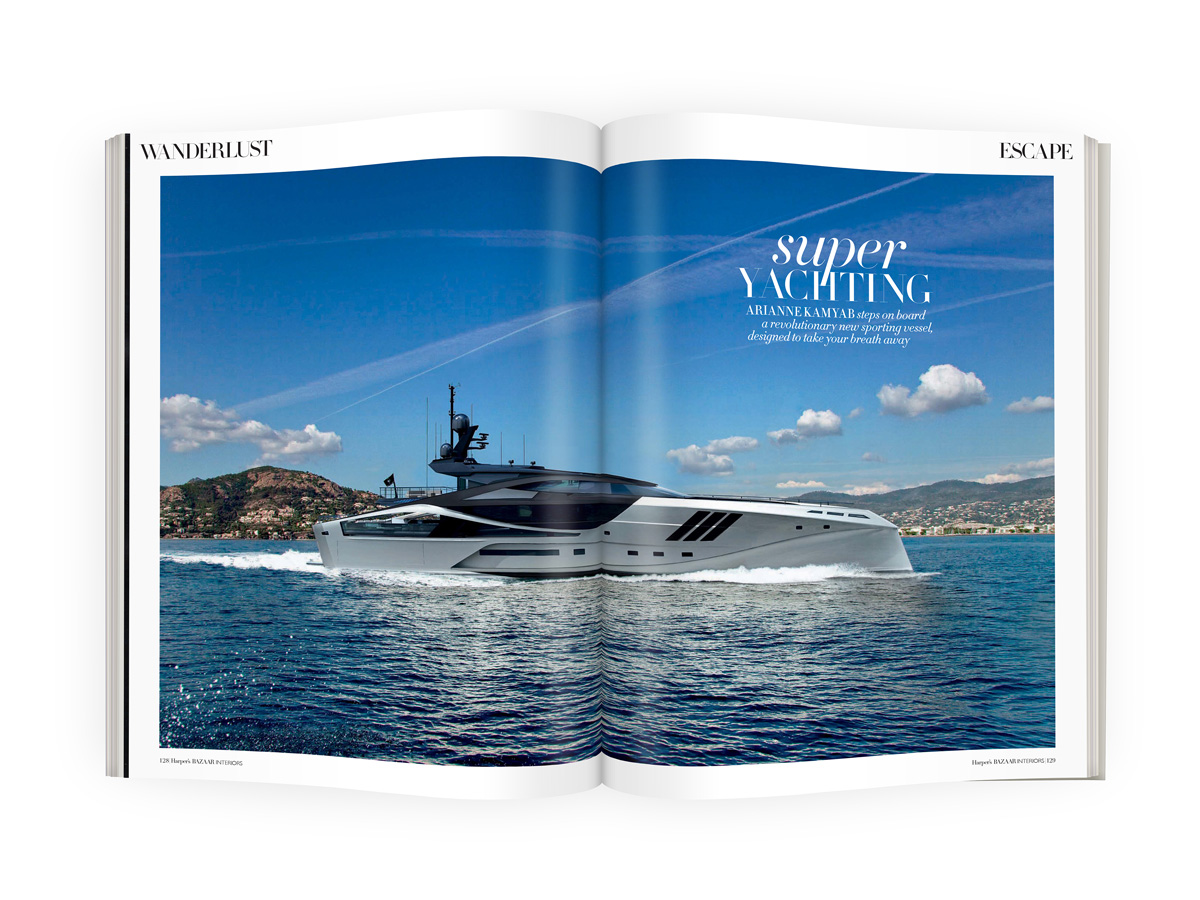
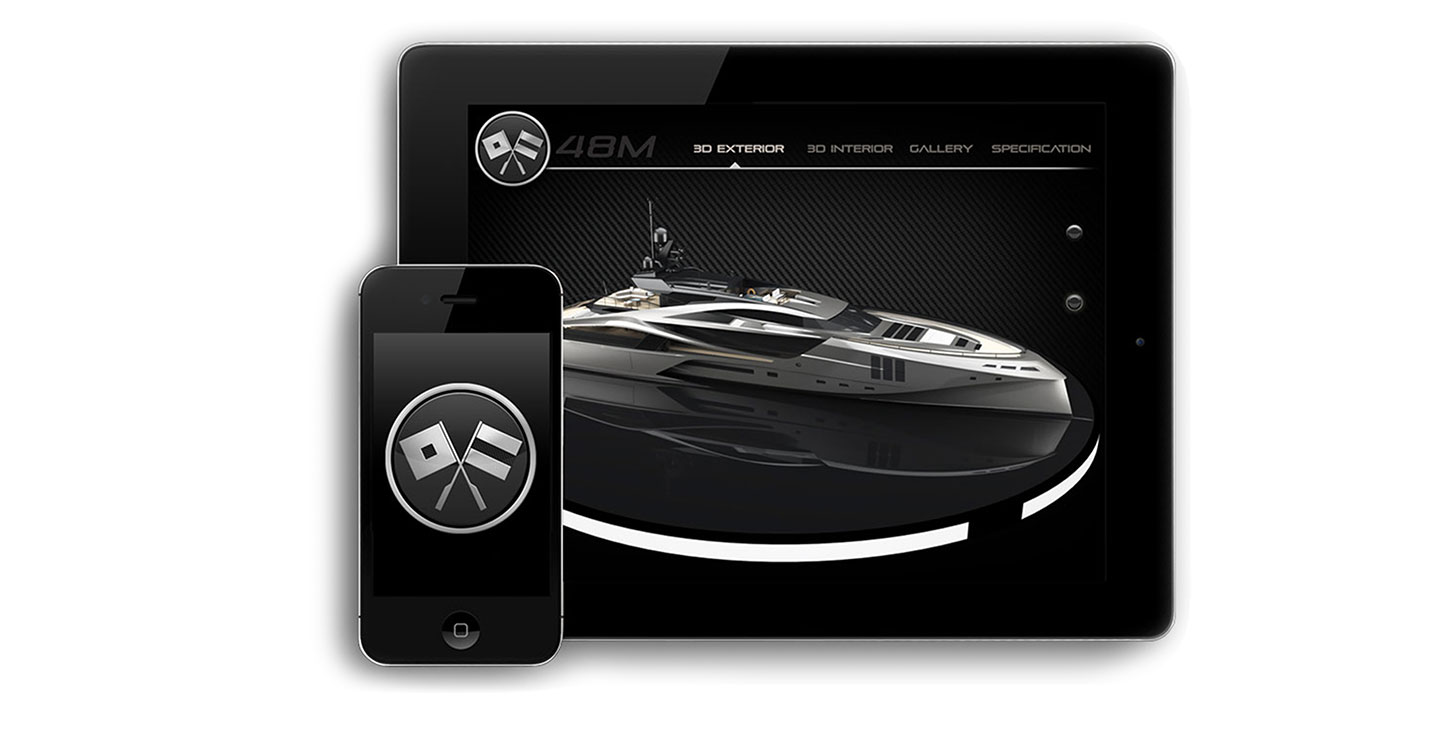
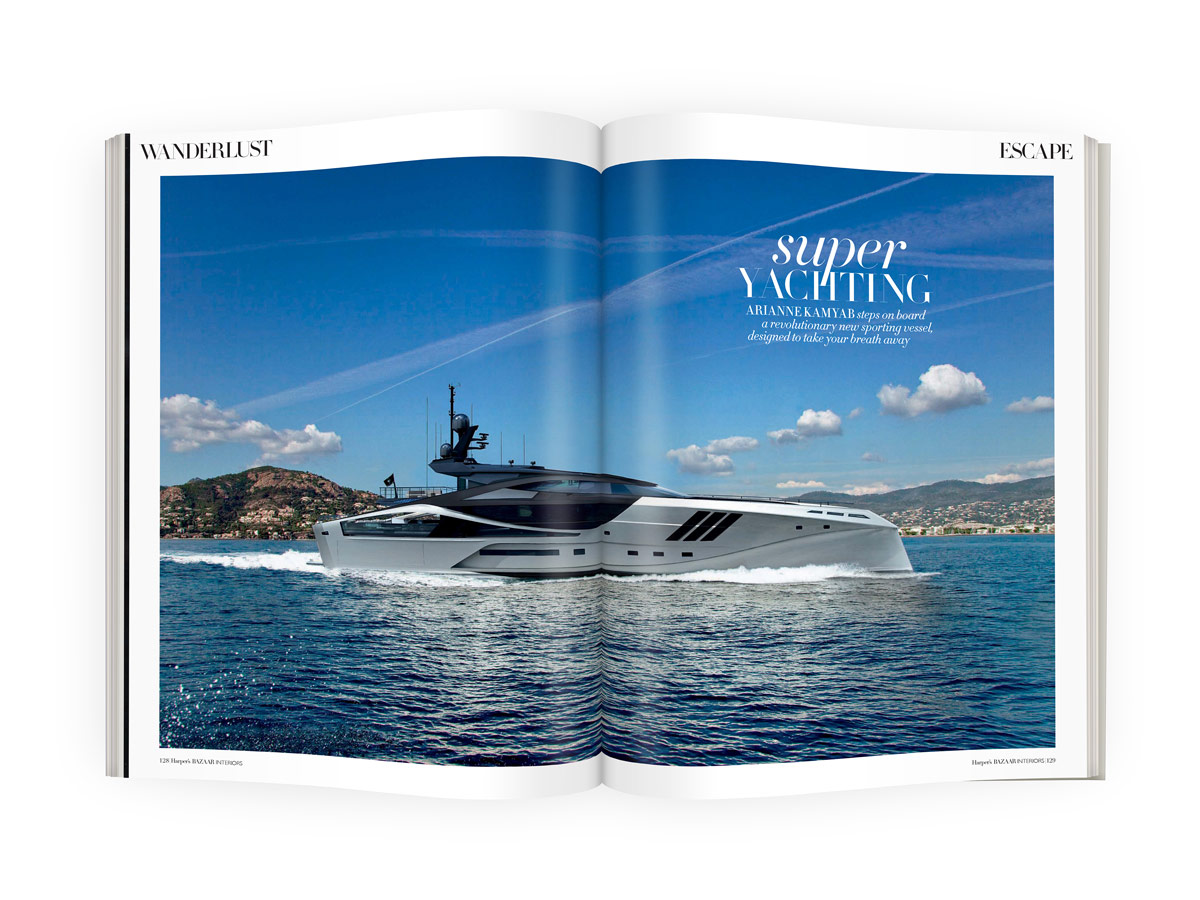
Over the years I have been blessed to have worked on extraordinary projects with dream clients from all around the world. From Super Yachts in Monaco to Private Jets and Luxury Apartments in London.

I now like travelling the world whilst freelancing, writing about 3D, teaching through my video training and giving talks.

The Quickest Way To Make 360 Renders in 3ds Max + How To Render Multiple Views On One Machine

The Quickest Way To Make 360 Renders in 3ds Max + How To Render Multiple Views On One Machine

Today I am going to show you how to create 360 stereoscopic renders. We can use these 360's on Websites, Apps, Facebook, Youtube, Octulus Rift and Google Cardboard. I will also show you how you can render multiple views locally on one machine. In a later lesson I will show you how to add hotspots. But first let's create some 360's. You can download the step by step PDF including the render settings.

Fed Up of having to Rasterize your Image in Photoshop?

Fed Up of having to Rasterize your Image in Photoshop?

It has taken me way to long to get this tip out there but I here goes. Whenever I drag an image into Photoshop is doesn't allow me to edit it until I Rasterize the smart object. There is a way to 'Auto Rasterize' an image when it is dragged into photoshop so you don't have to do it each time. You can change this in Preferences and then you will no longer have to go through the pop up message, added up this could save some time.

The Future of 3D Visualisation

"Then you better start swimmin' Or you'll sink like a stone

For the times they are a-changin'"

Bob Dylan - The Times They Are A-changin'

I love playing with the latest technologies and discovering future trends in the CGI industry. It is a fast moving field and you have to keep up if you want to be on top of your game. But it is easy to get carried away with the new 'super powers' these tools give you. With software getting easier to use more interior designers and architects are willing to try there hand at creating renders with good results. Is this bad news for the Visualisation Artist?

In a recent interview with the University of Creative Arts, I was asked my views on the future of the 3D Visualisation. This got me thinking about the future of the industry in terms of the artist and not the technology. I remember Lon Grohs of Choas Group saying at last years End User Event in Utrecht

"The last 10% is art, that matters, 90% is the tools"

I then started pondering the idea that we could be reaching a new era of art. Just like we did at the beginnings of the impressionism era. During this time we saw the invention and then the wide spread use of cameras. This made the need for highly realistic paintings less in demand, pushing artists to develop unique and creative styles rather than strive for realism. With talent and patience many extraordinary 3D artists are proving photorealism can be achieved. Meaning it is only a matter of time before more will follow in their footsteps. Once something has been proved possible many will then have the belief that it can be accomplished. In the same way the The Four-minute mile running barrier was broken, "It was first achieved in 1954 by Roger Bannister in 3:59.4. The "four-minute barrier" has since been broken by many male athletes, and is now the standard of all male professional middle distance runners."

Software is developing so rapidly that most interior designers and architects without much prior 3D knowledge will easily be able to turn their ideas into realistic renders. This could mark a turning point from photorealism to a more unique style like companies such as Mir and Luxigon Β have developed.

SPACEGROUP - Oslo Station - Oslo, NO by www.luxigon.com

If we take Disney for example the have the skills to create highly realistic renders but in recent shorts such as Paperman and Feast they have opted to go for more stylised looks.

Feast by Disney

When cameras first arrived there were professionals with expensive equipment and a vast understanding of the equipment to take pictures. Then it become a lot more accessible for the majority of people to take pictures. But there was still room for professional, uniquely skilled cameramen and there still is today. So what does this mean for the professional cameramen of the virtual world? We need to develop unique styles, a photographer does more than aim and click a button and so should we. If you fear that anyone being able to create realistic 3D renders is going to be detrimental to your profession you are looking at it all wrong. Everyone being able to create 3D renders is going to push you to get better, create better images and as a whole will benefit you as a creative and the industry.

I bet you spend considerably less time now setting up lighting and modeling furniture than a few years ago. The time freed up will enable us to be more inventive in how we use our individual creative uniqueness.

Anything that enables us to work less like machines and enable us to think more creatively is a pro in my eyes.

The future is good and is looking better because technology is becoming easier to use. This opens up visualisation to a wider audience and rather than fearing software that enables more people to create high quality images we should be happy. This will mean less monotonous work for us and in turn our work will improve because we will have to develop our artistic uniqueness rather than our skills with the software.

Many Thanks to Tom Glimps @tomglimpsΒ andΒ Simone GiampaoloΒ @SGiampaoloΒ for there help with this article.

Harpers Bazaar and a BMW rendered in Corona A7

HP-Spread-1.jpg

A couple of pieces to report this month, firstly I went to EUE in Utrecht back in June, as usual it was great to catch up with the CG heads and learn lots of interesting things about 3D. Particular highlights were meeting Eric de Broche of Luxigon fame and Nils Norgrens from Neoscape's talk on leadership and starting a company. Write up coming soon. Whilst I was at EUE I bumped intoΒ AdamΒ HotovyΒ who was kind enough to give me an early release of Corona A7. I took it for a spin with the new BMW i7. Corona is unbelievabley easy to use, get the conversion script from the forumΒ and pretty much hit render and your good. I left it overnight and this is what I got, I did some minor color adjustments in Photoshop, but here that is now built in to the release version.

Img---BMW


Harpers Bazaar also did a piece on the super yacht I have been working on recently. The images they used included a double page spread and some older interior images.


HP-Spread-1

HP-Spread-2

Palmer Johnson 3D Yacht App

APP-STORE2Bigg.jpg

I am happy to introduce the interactive 3D Yacht App created for Palmer Johnson. Available on the Apple App Store and free to download to Ipad and Iphone devices.

The SuperSport series is so unique that in our minds it definitely warranted the production of an app to show what makes these new yachts so special. The application contains exclusive content and is the perfect way to enjoy the many features the SuperSport has to offer and understand the design and build philosophy behind the series.

Main360-Interiors Turntables

Next generation design and fresh experiential yachting lifestyle are experienced through the rotating exteriors and the 360 interior views.

ipad_app_spec

The app includes handy marketing information. Ideal for brokers to present the yacht to their clients in a truly unique way, sure to produce maximum impact.

ipad_app_gallery

Β There is a gallery of images for each of Β these stunning carbon fibre yachts as well as layouts and brief specifications.

ipad_app_72interior

The App allows you to understand and view the fundamental principals that make this yacht series unique.

ipad_app_48turntable

You can get the Interactive Palmer Johnson app on the Apple App Store.Β Download now

3Ds Max Vespa Making of

gold-Vespa.jpg

I originally created the Vespa model back in 2008 as part of a 'mods vs rockers' video game project based in 1960's Brighton. I was highly influenced by theΒ 1979Β Β film Quadrophenia. When I moved down to Brighton in 2011 I was inspired to revisit the project. The model I originally created was for a video game a few years previous so it was quite low poly. This time round I wanted to push the realism of the model. Before this project I had not used the Mental Ray render engine very much so it was good to take the opportunity to develop my knowledge of the engine. I wanted to push the engine and show you could create a good amount of realism with Mental Ray. There were a lot of 'firsts' for me in this project, the use of mental ray, a HDR image for lighting and the use of Ambient Occlusion.

.

Vespa Reference

.

The reference was originally taken from a book on Vespas. I also watched the film quadrophenia a few times. It was great to have a low poly base mesh already modelled so I could start work on the fun stuff I really enjoy, adding details to the model. There was not many special modelling techniques used.Β The flag was made using the cloth modifier, which was pinned to the pole.Β The mirrors were made using splines and the headlight were made like this.
.
.
Vespa Headlight Material
.
For the paint material I really wanted to get a nice reflective coat on top of the paint layer itself. I really like the amount of reflections I could get from the vehicle because of all the chrome and mirrors. Most of the materials are very basic and looking back now I maybe could have added some bumps and reflection maps to add to the realism but I do like the clean, crisp effect I got from not adding imperfections. I used Β 10 materials show below.
.
Vespa Materials
.
To light the scene I used an interior HDR image from the Introduction to mental-ray-in 3ds-MaxΒ course from digital tutors. I put the HDR in the self illumination slot in the of a Standard Material and applied it to a inverted sphere and rotated it until I achieved a result I was happy with. There is a short post about that here HDRI lighting in 3ds Max and Mental Ray.
.
HRDI Lighting
.
Setting the camera is an important part of the image, I tried very much to abide by the basic photography rule of thirds. I tried many angles with various paint colours, some I was more satisfied with than others. I ended up with three shots that I wanted to develop.
.
Vespa Camera Angles
.
I then set the render engine to Mental Ray and began testing some settings. See below for the final render settings. I would recommend watching Rendering and Texturing in 3ds MaxΒ with Ramy Hanna.
.
Render Settings
.

I put a ground plan down to get a shadow pass for the floor using a dark blue colour. I rendered an image without this plane and then render the floor using a region selection. I also created an ambient occlusion pass. More information onΒ Ambient Occlusion How To: 3ds Max, Mental Ray and Photoshop.

Although when I created this image I did not use a Wire Colour Render Mask I recommend it to be able to control each material in post production. To create this pass I recommend Render Mask by Ivan TepavicharovΒ a excellent free script that has been develop to do a lot more than just wire colors including Z-Depth, AO, Reflections and many more. For other handy scripts and plugins check out theΒ Top Five Free Scripts and Plugins.
.
.rendermask
.
This is also a part I really enjoy, post production. Most of the work was done by Mental Ray so the post production was minimal. I began by bringing the passes into Photoshop, I overlayed the floor/shadow pass and put the AO on top using a multiply layer. I then painted in a gradient in the background matching the floor colour, this can also be changed in post. I then also put some gradients of colour to add some variation to the light and to set the mood of the image. Below shows the layers in Photoshop.
.
Photoshop Layers
.
I was happy with the result of the image and very proud that it was features on the front page of Autodesk's Area and to see it in 3D World Magazine. I hope that this Making Of has been helpful and if you enjoyed it or have any questions please leave a comment. I like to think that this site will speed up your development as a 3D Artist by trying to explain things that took me so time to learn.
.
Publications

A 10 step guide on how to add a pop up notes in 3ds Max with pictures

Script.jpg

A 10 step guide on how to add a pop up notes in 3ds MaxΒ with pictures. This guide will take you through every step in this simple process.

Add Pop Up Notes in 3ds Max

If you have downloaded one of the 3ds Max scenes from the downloadsΒ page you would have noticed a pop up note when you open it in 3ds Max. These can be useful for adding notes about the file for future reference or for a college who is going to use the scene or 3D model. To add pop up notes in 3ds Max Β is very simple just follow the steps below.

1. Right Click on the Main Toolbar in 3ds Max and select CustomizeΒ from the drop down list.

Add Pop Up Notes in 3ds Max Step 1

2. Click on the Menu tab at the top of the new window.

Add Pop Up Notes in 3ds Max Step 2

3. Now you can choose where you want to add the button to Add a Pop Up Note. I recommend Tools. So click the + next to the word Tools.

Add Pop Up Notes in 3ds Max Step 3

4. NowΒ drag and drop aΒ Separator bar across from the left side toΒ the bottom of the new list.

Add Pop Up Notes in 3ds Max Step 4

5. In the Action list in theΒ top left of the Customize User Interface window Drag and DropΒ Add a Pop up NoteΒ underneath the new Separator you just added.

Add Pop Up Notes in 3ds Max Step 5

6. Close the Customize window.

Add Pop Up Notes in 3ds Max Step 6

7. Now when you click on Tools in you should seeΒ Add a Pop up Note at the bottom of the list.

Add Pop Up Notes in 3ds Max Step 7

8. ClickΒ Add a Pop up Note.

Add Pop Up Notes in 3ds Max Step 8

9.Β In theΒ Pop Up NoteΒ windowΒ make sure thatΒ Show Note on File OpenΒ isΒ checked. Here is also whereΒ you can add the Authors Name, Date and Description. Click Add Note.

Add Pop Up Notes in 3ds Max Step 9

10. Now save. Now when you open the file the Pop Up Note will appear.

Add Pop Up Notes in 3ds Max Step 10

And there you have it you can now add pop ups note in 3ds Max. If you found this post useful or informative please help me by commenting and sharing. Thank you.

Related Content:

Hyperlapse Tutorial - How To

hyperlapse1.jpg

What is a Hyperlapse? A good Hyperlapse Tutorial and applying it to 3D.

Hyperlapse photography is very similar to timelapse photography. To create both timelapse and hyperlapse photography you take still shots at regular intervals. Where it differs is time-lapse shows the passing of time from a fixed point. Where as with a Hyperlapse the camera is moving. These images are then combined in a movie editing software to create a video.

Here is a video tutorial on how to create hyperlapse photography.  Griffin from the Indy Mogul, a  DIY movie making channel, talks to film makers  Chris and Oliver. They explain the techniques they use to capture shots with just a tripod and camera. This particular hyperlapse technique requires a lot of trial and error, but the outcome can be stunning.

For 3D Artists timelapse video is much easy to capture. In many 3D applications you can select a camera, click key frame and move your camera. Render out your frames. Then using a zdepth pass you can change the focus on your shots in adobe after effects or similar program.

Z Depth Pass for Hyperlapse Photography and Rendering

The hyperlapse video is used regularly in 3D architectural visualisation. One of the best architectural visualisations to date is Alex Roman's The Third and The Seventh. Watch the full length video below in full screen. The Third and The Seventh Book will be arriving soon so keep an eye on  http://www.thirdseventh-book.com/

The Third & The Seventh from Alex Roman on Vimeo.

Hyperlapses take a lot of time for a small amount of output. It has been compared to stop-motion meeting time-lapse photography. The results can be incredible for those who have the time and patience. Any other good hyperlapse or timelapse photography examples or tutorials drop them in the comments below.

Expose 11 - Finest Digital Art in the Known Universe

Expose.jpg

expose11_cover

Expose11-web

I am extremely proud to say I am in this years Expose from Ballistic Publishing. I am very happy to be featured next to the best artists in the world. This year had over 8000 images submitted from 58 countries. My image the Red VW Camper can be seen in the Transport section of the book.Β You can see more of my publicationsΒ here. TheΒ Red VW CamperΒ isΒ availableΒ for download over onΒ Turbosquid.

http://www.youtube.com/watch?v=PVpWOGRGRFk

Aston Martin Rendered with Keyshot and Mental Ray

Here are the first few images of anΒ Aston MartinΒ rendered with Keyshot and Mental RayΒ . The first two images of the Aston Martin VantageΒ are rendered in 3ds Max with Mental Ray and a HDRI environment, later on in the post the Aston Martin is rendered with Keyshot. The feedback on the studio shots are that as the car is in a studio the reflections should be of lights and not of an environment. Aston Martin Mental Ray Jaked3d

Aston Martin Mental Ray Jaked3d2

Below is the next stage of the Aston Martin rendered with Keyshot. In this render I used Keyshot rather than VrayΒ or Mental Ray and 3ds Max. It has proved to be a great learning experience, proving to me that Keyshot is an extremely quick and powerful tool. I also used HDR studio which I highly recommend. The next step for this project will be trying out Vray, 3ds Max and HDR Studio with higher resolution HDR images and backplates. As well as using the problems I encountered during this stage to improve the workflow in future. I hope to revisit this project when I can find time.

Aston Martin Keyshot Jaked3d

Here is a quick update image using Vray in a full 3D environment. That is three render engines and counting! :)

Aston Martin Parked

Photoshop Brush Smoothness

I always had a problem when painting with a hard brush in Photoshop. I found that the default would leave spaces. I never looked into fixing this until today, I used to go over the same area a few times. Not very productive I know.

Brush-hardness

In Photoshop open the Brush Tab by selecting Window - Brush or pressing F5. In there with the Hard Brush selected change the spacing to 1% rather than 25%. And there you are, a nice smooth brush.

To save the new brush hit New Brush Preset and OK.

brush

Then hit Brush Preset (top left of the pop-out) Preset Manage and move the new brush to where you want.

Then you can save the new set. brush1