It has taken me way to long to get this tip out there but I here goes. Whenever I drag an image into Photoshop is doesn't allow me to edit it until I Rasterize the smart object. There is a way to 'Auto Rasterize' an image when it is dragged into photoshop so you don't have to do it each time. You can change this in Preferences and then you will no longer have to go through the pop up message, added up this could save some time.
Harpers Bazaar and a BMW rendered in Corona A7
A couple of pieces to report this month, firstly I went to EUE in Utrecht back in June, as usual it was great to catch up with the CG heads and learn lots of interesting things about 3D. Particular highlights were meeting Eric de Broche of Luxigon fame and Nils Norgrens from Neoscape's talk on leadership and starting a company. Write up coming soon. Whilst I was at EUE I bumped into Adam Hotovy who was kind enough to give me an early release of Corona A7. I took it for a spin with the new BMW i7. Corona is unbelievabley easy to use, get the conversion script from the forum and pretty much hit render and your good. I left it overnight and this is what I got, I did some minor color adjustments in Photoshop, but here that is now built in to the release version.
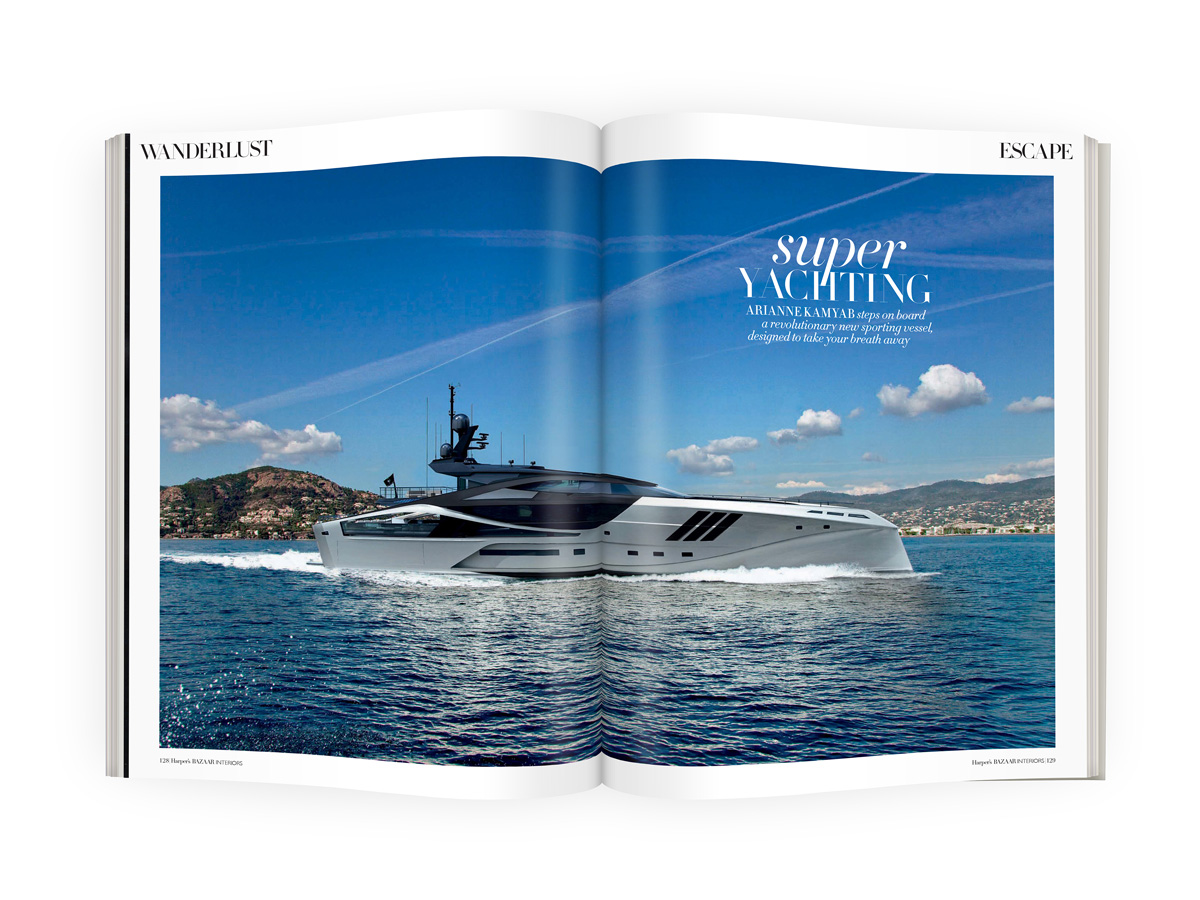
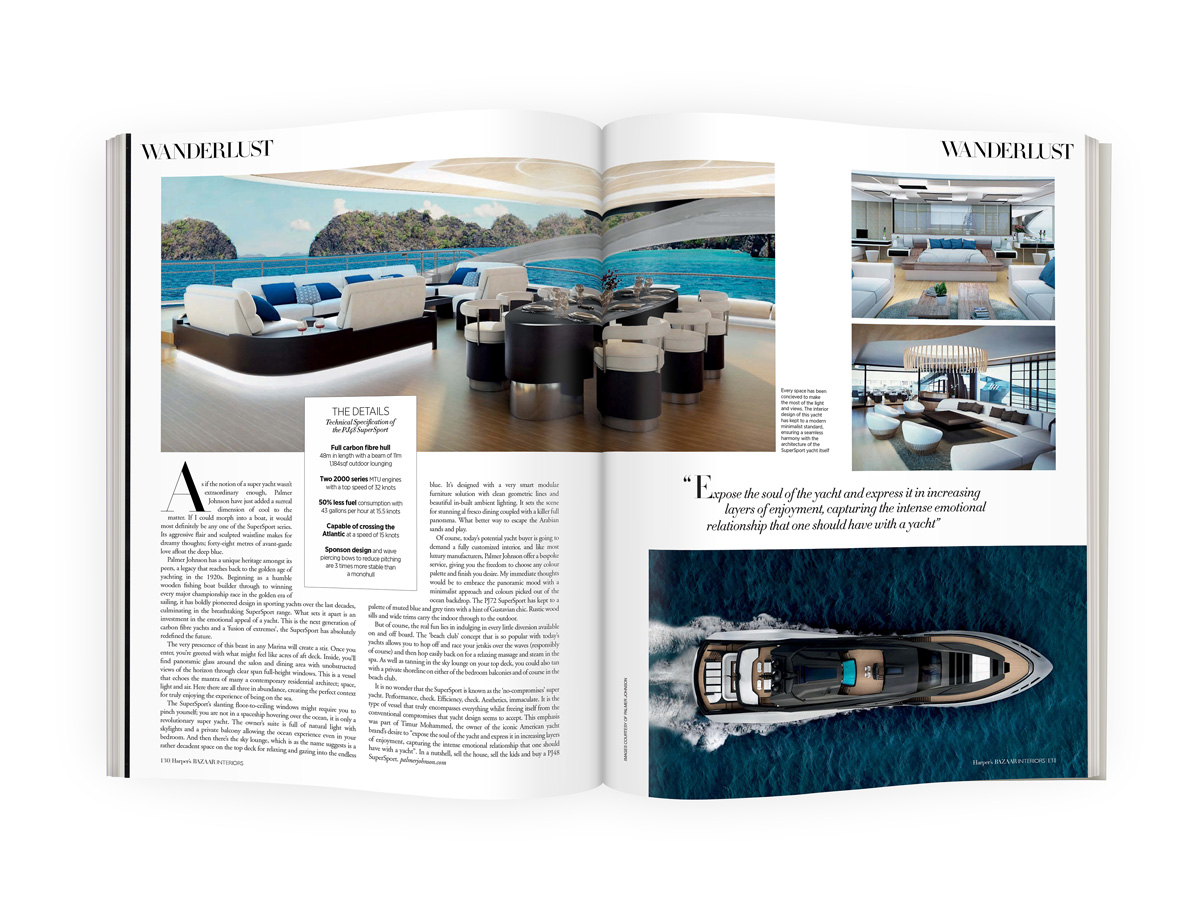
Harpers Bazaar also did a piece on the super yacht I have been working on recently. The images they used included a double page spread and some older interior images.
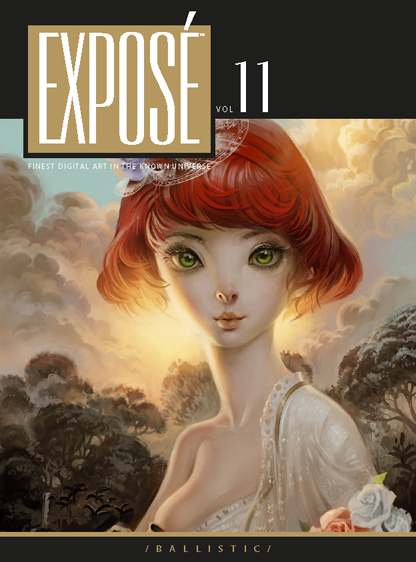
Expose 11 - Finest Digital Art in the Known Universe
I am extremely proud to say I am in this years Expose from Ballistic Publishing. I am very happy to be featured next to the best artists in the world. This year had over 8000 images submitted from 58 countries. My image the Red VW Camper can be seen in the Transport section of the book. You can see more of my publications here. The Red VW Camper is available for download over on Turbosquid.
http://www.youtube.com/watch?v=PVpWOGRGRFk
Photoshop Brush Smoothness
I always had a problem when painting with a hard brush in Photoshop. I found that the default would leave spaces. I never looked into fixing this until today, I used to go over the same area a few times. Not very productive I know.
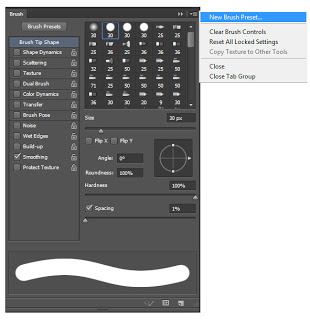
In Photoshop open the Brush Tab by selecting Window - Brush or pressing F5. In there with the Hard Brush selected change the spacing to 1% rather than 25%. And there you are, a nice smooth brush.
To save the new brush hit New Brush Preset and OK.
Then hit Brush Preset (top left of the pop-out) Preset Manage and move the new brush to where you want.
Exterior Yacht Render
Download Adobe Photoshop CS6 Beta
 Adobe Photoshop CS6 Beta is available to download here.
"The world’s best digital image editing software is about to get even better. Explore Adobe® Photoshop® CS6 beta for a sneak preview of some of the incredible performance enhancements, imaging magic, and creativity tools we are working on. Discover for yourself why Photoshop CS6 software will be a whole new experience in digital image editing."
http://www.youtube.com/watch?feature=player_embedded&v=uBLXzDvSH7k
Photoshop and Wacom Tablet tips
I have been doing a lot of post production work in Adobe Photoshop with my Wacom tablet recently. A couple of things I came across that I thought might be useful to share.
 1. Ring when tapping in Photoshop with a tablet.
This can become very annoying. I believe it comes as default in Windows 7. This is how I got rid of the problem in Windows 7 x64 bit.
-In the Control Panel search for Edit group policy. -In here you need to go to administrative templates, windows components, tablet pc, cursors, turn off pen feedback.
-In this window change from not configured to enabled.
-Click OK and your done.
Update: There is a lot more information on this subject here.
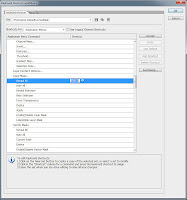 2. Add a Layer mask shortcut.
I am constantly using layer masks and do get feed up of going all the way to the bottom of the Layers pallete to click the button. In Photoshop there is no default shortcut. To add a shortcut click Edit, Keyboard Shortcuts, under Layer Mask> add a shortcut key (I used Ctrl+Q) to Reveal All.
Photoshop CS6
http://www.youtube.com/watch?feature=player_embedded&v=UrlsnQ32YhY
Adobe have realeased 6 sneak peek videos on Youtube of the upcoming Photoshop CS6. Video 4 'Content-Aware' was of most interest to me. In the video Product Manager Bryan O'Neil Hughes demonstrates how to move or remove an object from an image using the content- aware tool. See below for the other 4 videos.
http://www.youtube.com/watch?feature=player_embedded&v=pBIf9KljT68 http://www.youtube.com/watch?feature=player_embedded&v=XLp1dR2sYkE http://www.youtube.com/watch?feature=player_embedded&v=zDfL021HkCg http://www.youtube.com/watch?feature=player_embedded&v=9wx8P-GQxOw
Fix Your Photo’s Exposure Problems in Seconds With This Simple Trick from Lifehacker
http://www.youtube.com/watch?feature=player_embedded&v=UyIHpRjaBic
- Open up the photo and duplicate the layer containing it.
- Invert the duplicated layer. (The shortcut is Control/Command+I in Photoshop and is likely the same in other image editors.)
- Set the duplicated layer's blending mode to Overlay.
- Optional: Reduce the opacity of the duplicated layer if the effects are too much.
- Optional: Merge the two layers and adjust the levels or curves to suit your taste. (If you're in Photoshop, you can just make a new adjustment layer to do this.)
New Mental Ray Aircraft Render
Cambridge, UK Modular Buildings Project.
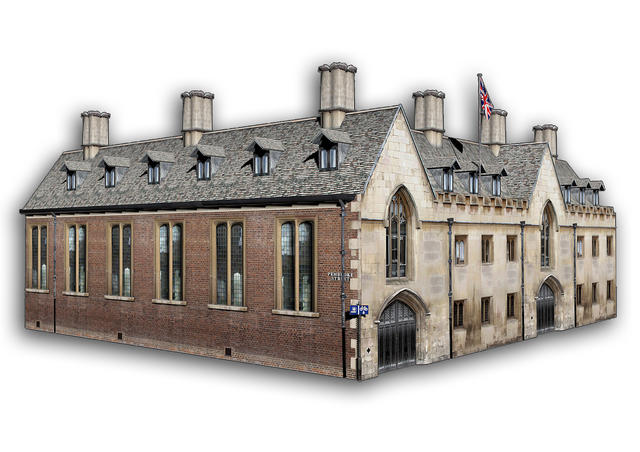
 This week I shot some textures in Cambridge for a modular building project I am working on. The benefit of modular building is the ability to use parts of the building like lego blocks to create variations using the same materials and without lots of modelling work. See below for example the blocks on the left can be used to create many variations of the building on the right. The Cambridge photo shoot Texture Pack is available in the Downloads section on this site along with the 3d Models, Photoshop .PSD files and a Prezi tutorial of how to create your own buildings quickly.
Ambient Occlusion How To: 3ds Max, Mental Ray and Photoshop
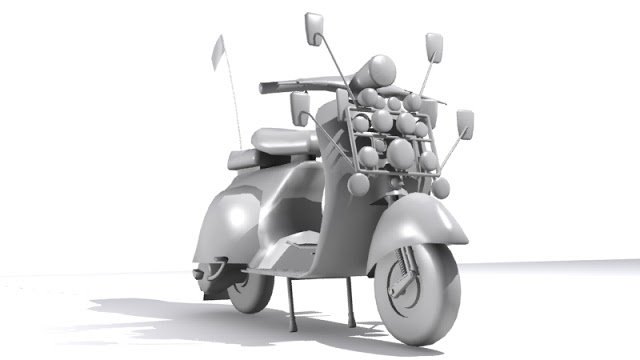
As mentioned in Basic Compositing in Post Production I will go through how I create an ambient occlusion material and use it in Photoshop. Ambient occlusion can be used to enhance shadows in renders. I have set up a model of a Vespa that I previously made and added some lights to the scene. This is how the render currently looks.
In a new material slot in the material editor (M on the keyboard) the first thing I do is change the Ambient and Diffuse colours to black and tick on Self-Ilumination.
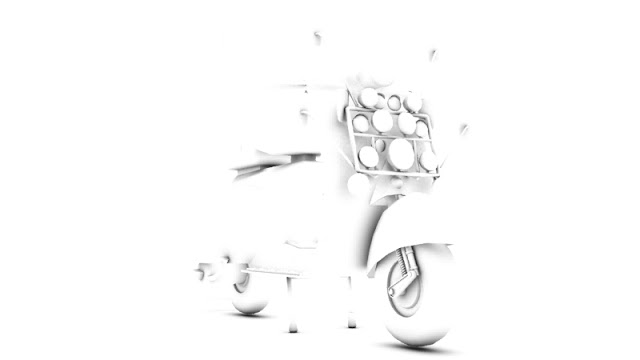
Then up the max distance in the Ambient/Reflective Occlusion Parameters until you get your desired result. Here is mine.
 Save the render and open the original and Ambient Occlusion Render in Photoshop and whilst holding Shift drag the Ambient Occlusion onto the original render and change the layer style to Multiply. You can also change the opacity if need. Here is the final result.
Basic Compositing in Post Production
I recently completed a couple of new interior renders for an Avro RJ using 3ds Max and Mental Ray. So I thought this would be a good time to explain the basic Photoshop Postwork I go through.
Compositing in post production is one of the most important and probably most over looked parts of CG. It was only recently I started compositing different renders to improve the quality of my final images, so I am in no way an expert but this is how I composite my images.
The most important thing is lighting, something that I am yet to master but here are some great links to get you on your way. 8 Tutorials To Make You Fully Understand 3D Lighting In CG. But this will only get you as far as the render output on the image above.
Adjusting the Levels (Image > Adjustments > Levels) in Photoshop will make sure you are getting the most colour range out of your image.

Rendering out an Ambient Occlusion Pass from your 3d application is one of the best ways to improve results. The render will look something like the one here. Put it on top of your image in Photoshop and Multiply or Overlay it in the layers, you can also adjust the opacity. I then duplicate and merge the layers and adjust the Levels and the Brightness and Contrast.
When rendering out of 3ds Max I have found the images could do with crisping up. To do this add a Unsharp Mask. (Filters > Sharpen > Unsharp Mask)
To get a Lens Blur or Depth of Field you will need to render out a Zdepth pass. The output should look something like this one. You can override all materials instead of replacing them in 3ds Max (Render Setup > Processing > Material Override > Check the Box and drag the material in.) The last thing I do is adjust the contrast and save the image out. There is so much more you can do but here are the basics of what I generally do.


