Category: Private Client Services Provided: Feasibility, Concept, Appraisal, Local Authority Representation, Green Belt Planning Consent & CGI Visualisation Location: Hoghton, Lancashire
Autodesk 123D Catch Beta
http://www.youtube.com/watch?feature=player_embedded&v=6aU2s85Zw3A
So I downloaded the software from here. The software comes with some good tutorials and the program is pretty straight forward to use. For the object I wanted to create I took 42 photos spinning around the object. I uploaded them and waited for Autodesk to email to let me know it was completed. A couple of the images were too dark so the object I received was not 100% but 42 images is probably the minimum I would suggest.
It looked pretty good if I do say so myself. Next, what I was most excited about was getting it into 3ds Max. This was simple, File, Export, FBX and import into Max, this is what I got below.
The scene contains cameras where all the shots were taken from, which could come in handy. I then opened up the Material Editor and selected the material from the object. There were two in this case. The file Autodesk emailed me contained to texture sheets which I remapped to the correct location and below are the 2 texture sheets and the result i got.
Vespa
.
.
.
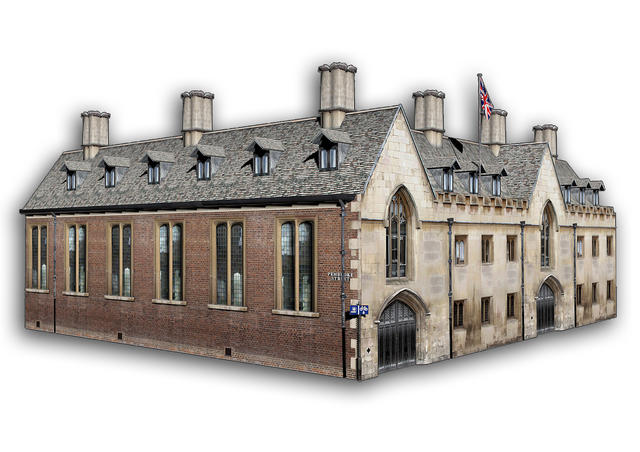
Cambridge, UK Modular Buildings Project.
 This week I shot some textures in Cambridge for a modular building project I am working on. The benefit of modular building is the ability to use parts of the building like lego blocks to create variations using the same materials and without lots of modelling work. See below for example the blocks on the left can be used to create many variations of the building on the right. The Cambridge photo shoot Texture Pack is available in the Downloads section on this site along with the 3d Models, Photoshop .PSD files and a Prezi tutorial of how to create your own buildings quickly.
How to Model, Texture, Light and Render a Macbook in 3ds Max
I have a series of lectures coming up and one of them will be Modelling a Macbook in 3ds Max, here is the first attempt. This video is at about 10x speed and shows how to set up blueprints and model the Macbook using simple primitives and pro boolean. I am not the biggest fan of boolean but in this case they proved very effective. http://www.youtube.com/watch?v=3fbc_jj8MXg In the second video of the series I go through Texturing, Lighting and Rendering a Macbook in 3ds Max. This time it is a brief introduction to materials and texturing. Again the video is at about 10x the speed and shows a simple Mental Ray setup for rendering, materials and adding an animated texture to the object.
http://www.youtube.com/watch?v=stxr7l-yZxM
You can also buy my model from turbosquid.


