Hyperlapse Tutorial - How To

hyperlapse1.jpg

What is a Hyperlapse? A good Hyperlapse Tutorial and applying it to 3D.

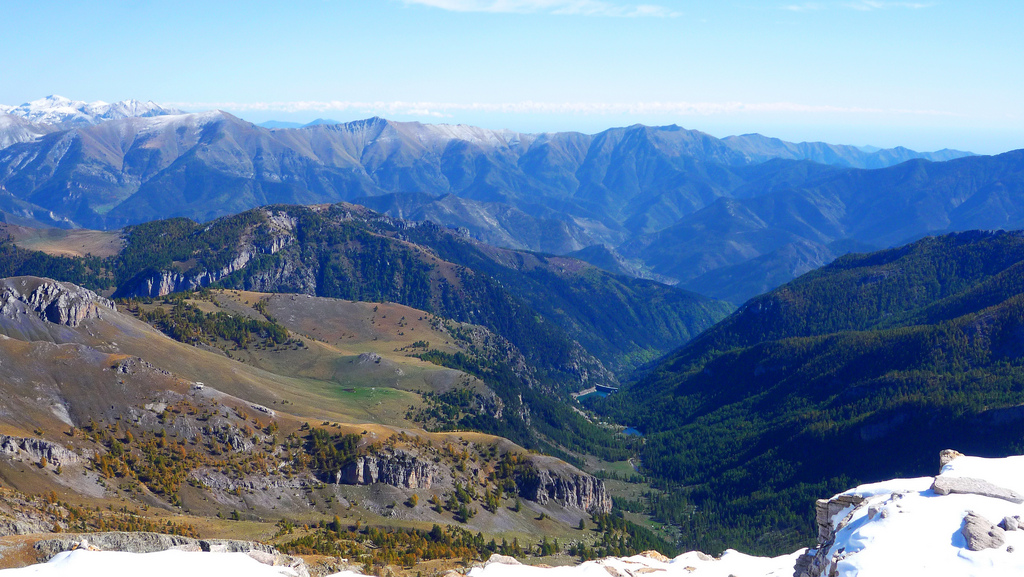
Hyperlapse photography is very similar to timelapse photography. To create both timelapse and hyperlapse photography you take still shots at regular intervals. Where it differs is time-lapse shows the passing of time from a fixed point. Where as with a Hyperlapse the camera is moving. These images are then combined in a movie editing software to create a video.

Here is a video tutorial on how to create hyperlapse photography.  Griffin from the Indy Mogul, a  DIY movie making channel, talks to film makers  Chris and Oliver. They explain the techniques they use to capture shots with just a tripod and camera. This particular hyperlapse technique requires a lot of trial and error, but the outcome can be stunning.

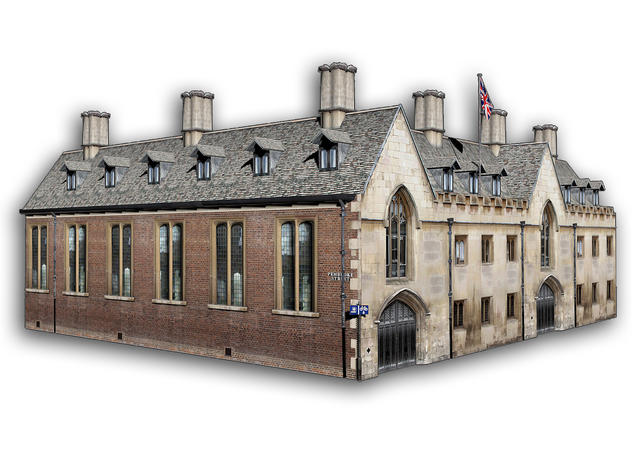
For 3D Artists timelapse video is much easy to capture. In many 3D applications you can select a camera, click key frame and move your camera. Render out your frames. Then using a zdepth pass you can change the focus on your shots in adobe after effects or similar program.

Z Depth Pass for Hyperlapse Photography and Rendering

The hyperlapse video is used regularly in 3D architectural visualisation. One of the best architectural visualisations to date is Alex Roman's The Third and The Seventh. Watch the full length video below in full screen. The Third and The Seventh Book will be arriving soon so keep an eye on  http://www.thirdseventh-book.com/

The Third & The Seventh from Alex Roman on Vimeo.

Hyperlapses take a lot of time for a small amount of output. It has been compared to stop-motion meeting time-lapse photography. The results can be incredible for those who have the time and patience. Any other good hyperlapse or timelapse photography examples or tutorials drop them in the comments below.

Expose 11 - Finest Digital Art in the Known Universe

Expose.jpg

expose11_cover

Expose11-web

I am extremely proud to say I am in this years Expose from Ballistic Publishing. I am very happy to be featured next to the best artists in the world. This year had over 8000 images submitted from 58 countries. My image the Red VW Camper can be seen in the Transport section of the book. You can see more of my publications here. The Red VW Camper is available for download over on Turbosquid.

http://www.youtube.com/watch?v=PVpWOGRGRFk

Aston Martin Rendered with Keyshot and Mental Ray

Here are the first few images of an Aston Martin rendered with Keyshot and Mental Ray . The first two images of the Aston Martin Vantage are rendered in 3ds Max with Mental Ray and a HDRI environment, later on in the post the Aston Martin is rendered with Keyshot. The feedback on the studio shots are that as the car is in a studio the reflections should be of lights and not of an environment. Aston Martin Mental Ray Jaked3d

Aston Martin Mental Ray Jaked3d2

Below is the next stage of the Aston Martin rendered with Keyshot. In this render I used Keyshot rather than Vray or Mental Ray and 3ds Max. It has proved to be a great learning experience, proving to me that Keyshot is an extremely quick and powerful tool. I also used HDR studio which I highly recommend. The next step for this project will be trying out Vray, 3ds Max and HDR Studio with higher resolution HDR images and backplates. As well as using the problems I encountered during this stage to improve the workflow in future. I hope to revisit this project when I can find time.

Aston Martin Keyshot Jaked3d

Here is a quick update image using Vray in a full 3D environment. That is three render engines and counting! :)

Aston Martin Parked

Photoshop Brush Smoothness

I always had a problem when painting with a hard brush in Photoshop. I found that the default would leave spaces. I never looked into fixing this until today, I used to go over the same area a few times. Not very productive I know.

Brush-hardness

In Photoshop open the Brush Tab by selecting Window - Brush or pressing F5. In there with the Hard Brush selected change the spacing to 1% rather than 25%. And there you are, a nice smooth brush.

To save the new brush hit New Brush Preset and OK.

brush

Then hit Brush Preset (top left of the pop-out) Preset Manage and move the new brush to where you want.

Then you can save the new set. brush1

How To Record Actions in 3ds Max like in Photoshop

I was looking for a way to repeat some of the most common tasks I perform in 3ds max. It turns out that using MAXScript is the way to do it. Don't let the word 'script' scare you, it is pretty easy. The task I wanted to create an 'action' button for was. -Apply UVW Map -with Box Mapping and Real-World Scale

To create the Script we need an object to record the action from. So just create a box.

Click on MAXScript (next to Help) on the top menu. Select MAX Script Listener

This Box will pop up, Click MacroRecorder and Enable from the dropdown. 1 Now what ever you do will be recorded, like in Photoshop actions.

Apply a UVW Map > Mapping to Box > tick Real-World Map Size Turn off the MacroRecorder by hitting enable again.

This is what you have. modPanel.addModToSelection (Uvwmap ()) ui:on $.modifiers[#UVW_Map].maptype = 4 $.modifiers[#UVW_Map].realWorldMapSize = on $.modifiers[#UVW_Map].utile = 1 $.modifiers[#UVW_Map].vtile = 1 $.modifiers[#UVW_Map].length = 1 $.modifiers[#UVW_Map].width = 1 $.modifiers[#UVW_Map].height = 1 Select all the text and copy it.

At the top of Max go to MAXScript again and New Script. Paste in the code.

At the top copy and paste this... macroScript UVWmap category:"Jaked3d" buttonText:"UVWmapRWS"

You can change the name of the Script (UVWmap) category:"(Jaked3d)" and buttonText:"(UVWmapRWS)"

Add brackets to the top and bottom of the code like below

Max Script

Now in MAXScript > File > Save where you like In MAXScript > Tools > Evaluate All

Now in the top menu in 3ds Max Select Customize > Customize User Interface In the Toolbars tab in Category you should find what you called your category you can now drag it 'Uvwmap' onto the Main Toolbar.

3

You can now select any object in your scene and apply your script. You can download this one here. Jaked3d UVWmapRWS

You can then combine your 'actions' with other scripts. For example I recorded the same action in the above example with the Centre and Reset script from Frodos Magic Bag to centre the pivot of an object > reset xform > apply uvw map with box mapping and real world scale, in one hit of a button.

Search Macro Scripts in 3ds Max Help for lots more info.

CG Health and Well Being

With January coming to a close and New Year resolutions starting to lose momentum it can be hard to continue with the well intentioned goals you set yourself at the beginning of the year. This is a bit off the normal topics of the site, but I think it is important for industry we are in
welcome_appsApps I have found apps a great incentive. I am currently using the free version of Map Draw to track the runs I do, I then email the map to my friend to show off! For my never ending todo list I love using Epic Win. This app turns your todo list into a RPG game.

Seinfeld's Productivity Secret Credit has to go to Lifehacker for this great tip. Stick up as many calanders as you need and write the goal on top. Each day put a X if completed. The idea is not to brake the chain and it works! Here is the article How Seinfeld's Productivity Secret Fixed My Procrastination Problem

Get Up Having a few small breaks and walking around (not disturbing anybody) during the day is recommended by everybody but it is tough to do. I set reminders on the computer to pop up using great apps like Workrave and Coffee Break.
Lunch It is so easy to eat at your desk, but get out for at least half an hour. It is easy to get 'blinded' by what you are working. I am actually writing this post in a park near the office. Get some fresh air .
1389664_18978880

Posture I wanted to improve my posture at my desk and I also wondered why was I getting so tired from sitting at a desk. Some people suggested that getting tired is not always due to mental fatigue. If you sit awkwardly at your desk it can make your muscles tense. If you stay in the same position for a long time tensed all day this can make you tired. The solution sounds quite easy, just take a moment to notice how you are sitting and relax.

Getting Moving I was interested to see how much I was moving daily, the recommended amount per day is 10,000 steps. I bought a pedometer (I am sure there are apps) and I now aim to beat the previous days steps. This encourages me to jog in the mornings and take the steps instead of the evaluators. I am currently averaging 10,461 steps per day.

Join a Club I highly recommend joining a sports club, it is a great motivator to get moving and release some stress after work. I play Squash twice a week with a colleague, I have found it is great motivation to have somebody to go with and not to let them down. It always seems harder to let some body else down other than yourself.  Being in another country I thought it could be difficult to find and join a club but it was surprising easy and if I can do it here then so can you.
Move Your Bin This is a great one, move your bin away from your desk so you have to move. This also gets the steps on the pedometer up!
966608_24258993
Water Bottles I have been doing for a while now, I have two 1 litre bottles. One in the fridge and one on the desk. The task is just to get through them in the day. If I have not finished one by lunch time it's time to speed up.
Take the Stairs Where I live there are a lot of steps to get to work. There are public lifts and escalators which I used for a long time. But since September I have been taking the stairs and I feel much fitter. It does get easier!
Park Further Away If you drive then you can park further away to get some more exercise and you may also save some money in parking costs.
For more health and fitness advice follow @_FitnessAcademy

French Alps Hike

After the amount of time I have been stuck to a computer lately a friend of mine Kim and I went on an eventful 4 day hike through the French Alps. One of the highlights was reaching the top of Mount Bego at 9,423 ft and raising £330.00 for a children's hospice in Brighton. The views through out the trip were amazing and the pictures could never do it justice. But here are a view pictures from the hike. I have some HDRI's to put together when I get a minute. More pictures here.
8112584003_eaf1525de4_b


.8112594472_f000a59192_b
.
8112607524_fe70265665_b

State of the Art Academy Day 3

Venice-building.jpg
logo_big_white copyI headed over to Venice for a few days to attend State of the Art Academy Day 3. There was great talks from speakers such as Peter Guthrie, Pixela, Ronen Bekerman, Adam Hotovy and Tomek Miksa. Lots of great subjects were brought up and I got to meet a lot of the 3d community. I particularly enjoyed Pixela showing how to create amazing pillows in Marvous Designer and Adam Hotovy giving a great insight into the importance colour theory and harmony. A couple of cool links to check out are Gobotree and Color Scheme Designer 3
Venice building
I also got the chance to check out Venice and I am working on the texture pack which should be up here soon.

VW Camper Van

Jaked3d-5.jpg
Red VW Jaked3d
I have finally got around to uploading my Volkswagen Camper Van to Turbosquid.
It was originally created with 3ds Max 2011 using the Mental Ray renderer. (2010 and 2012 .max included)

Containing both a high and a low poly version.
High Poly- 436,176
Low Poly-17,509
This model is suitable for use in advertising, design visualisation, films and games.
The model can be switched from high poly to low poly by turning on and off the turbosmooth in the modifier stack.

Boat International Cover and Monaco Yacht Show

Boat-Cover.jpg
BI3
Monaco Yacht Show was on this week. In the build up to the event I have been extremely busy creating images for press and the exhibition. I am happy to say that a image made it as the cover image for Boat International for the October issue. There was also a six page spread in the magazine. You can see the article on the publication page. The show also marked the unveiling of three of the new yachts in the SuperSport series which receive a lot of attention.
MYS DAY small
I also took the opportunity to head up to the top of Monaco and get some HDRI Panorama shots. Although for the first attempt of the night shot I headed up without any battery. I have learnt my lesson to always check my equipment before I head off.
MYS small

3ds Max Cleaner, Remove Missing Plugins and a cool iPhone App and More

Here are a few things I have learnt this month.unlink1. If you can not Group objects in 3ds Max then with the objects selected hit the unlink button on the left of the main toolbar. Then try and group it and it should work. This happens to me when I import files from AutoCAD and other software. 2. Camera Converter. To quickly add cameras I hit Ctrl+C in the 3ds Max viewport this is great when selecting views with others. But if you are using Vray it can be a pain to line the Vray Physical Camera up. This is where Anything to Physcam from Lele's Vray Tools on script spot is really great. There is a good video on how to use it from Alex over at Vray-Studio.

3. Cleaner. I was having trouble with a scene that was taking ages to load and save. I also had to turn off autoback and it really got hard to work with. Then I found Cleaner on script spot. This amazing tool got my file down from around 1gb to 200mb! touchmouse2-245x3004. Remove Missing Plug-ins. I started to use Rebus Farm and I had a plug-in that Rebus did not. They are quite good with having Plug-ins but I could not send it until I sorted it. This can be quite a pain to resolve, but not with Remove Missing Plugins from Martin Breidt. Really easy to use and extremely useful.

5. How to setup Depth of Field in 3ds Max. A great reminder on setting up a DOF pass in 3ds Max from Onno Van Braam.

6. Wireless Trackpad and Keyboard iPhone App. This great app from Logitech turns your iPhone into a mouse and you can type to. This is handy when watching films on the TV from the laptop and not wanting to have to move.

Polygons to Solids for 3D Printing

3ds Max to Solid
The reason for this blog article is to save you from the terrible time I had exporting a polygon mesh into a solid. Basically taking a mesh file and turning into a .iges or similar for 3d printing. After searching the forums and testing out tools that claim to do the job with no luck I had to get busy...

It is possible to take a mesh into Rhino and use the MeshToNumb command, but the mesh needs to be under 20,000 poly and once it is converted it is not smooth and for 3d printing you probably want it smooth. In 3ds Max there is a way to turn your model to Nurbs and export as an .iges. For small models this may work but not for me. If you right click on the model and Convert to Patch and once that is done right click again and Convert to Nurbs. I have not successfully used this method because I have never had the time to wait for the conversion so be warned it does take sometime.
So in 3ds Max there is an export to .iges file in the export box. File>export but unless your model is in Nurbs rather than ploys then this option won't work. So here is how I managed to get quite a heavy max scene into a solid format. This is in no way the correct method but if there is one I would love to know about it.
So here we go with my method. In 3ds Max select your mesh and go to File>Export as .obj. Then open this great tool called 3d Exploration which can be downloaded here. Navigate to the .obj file in here and save it out as a .stl file.
Open up Rhino and import the .stl file. Select the mesh and type in the command bar MeshToNurb. Once this is done select the mesh and delete it, then you should be left with the nurb object. Now all you have to do is export it as an it as an .iges :)