Quick Summary
Here is a quick summary of what my blog post will cover so you can decide if this article is for you.
These are the tips in no particular order.
Speed up your workflow with scripts. Let the robots do the work.
Use fur to soften up your scenes. Use organic objects to add realism to your CGI.
Soften your edges, easily. How to use maps rather than chamfer.
Depth of Field. Add realism to your shots with DOF.
The future of rendering. Fast, efficient and cost-effective. This changed everything for me.
Do you want step-by-step instructions to implement all these tips?
Alright, let's get going.
The Tools
The tips I am going to show you are from the Interior Visualisation with 3ds Max and V-Ray course, but don't worry about that just yet, check out the tips and see if you like them, because if you don't like them then the course definitely won't be for you ..
These are a few of the things I personally do to speed up my workflow and deliver high-quality images to my clients.
After you're done reading and watching, you'll have new techniques to use when creating 3D renders. My objective is to provide you with techniques so that you can start replicating the results in your own images for your own clients.
The tips I am going to share are going to save you buckets of time in the long run and improve your rendering, so invest in yourself now and learn these techniques. I'll now go into details of my favorite tips using 3ds Max + V-Ray and show you how you can do the same in your own 3D renderings.
But first, if you have not got 3ds Max and V-Ray installed you can find trial versions here (3ds Max + V-Ray) You don’t have to use these tools specifically. Have a read and apply whats good and ditch what's not.
1. Make Quick Scripts
Scripting, coding, whatever you call it is reserved for developers, not artists, right?
Wrong, one of the best things I have done in my work is to see what scripts are all about.
The best artists in the world recommend them. 20 Top Tips From The World’s Best 3D Artists.
Have you ever thought, I do this task over and over again, there must be a quicker way? Well, you’re right there is.
I made a copy and paste script and I worked out it made me about 83% quicker in that specific task.
My Maths
You can download the script from the resources of the course, but you should create it yourself so you know what your doing, ‘give a man a fish, give a man a fishing rod…’
So here is how I did it…
Open MAXScript Listener from the Main Toolbar. Scripting > MAXScript Listener
This is going to open up the Max Script Listener window.
In here you will see MacroRecorder, click this and Enable
I think this is one of the coolest things in 3ds Max, it basically shows you what’s going on behind the scenes.
Go ahead and create a box one and watch what happens in the Listener. If you want to create a box in the future then you can just copy and paste this script.
I know you know how to make a box using Create > Standard Primitives > Box and click and drag. But if you think about that, you’ve done 3-4 clicks.
If you make a button for your script it will be 1 click. Making this action 3-4 times quicker next time. Compound this and the effects are massive.
Obviously this is a very basic example, but some good uses for small scale scripts are
Add a 100cm x 100cm, Box, UVW map. (5 clicks become 1)
Reset X-Form and ground pivot points. (6 clicks become 1)
Add a Real-World UVW box map + Chamfer (5 clicks become 1)
Create a new basic material and apply to the selected object (7 clicks become 1)
As a general rule, if you find you have done a task 5 or more times in your life it’s time to consider if you should make a script for that action.
Here is a video showing how to make the copy and paste script.
2. Use Vray Fur
3D is made up of polygons, basically squares. Squares have straight edges, which means in previous years it was tough to make ‘organic’ objects. Things such as plants, fabric and soft, curvy things were hard to make look realistic because of poly count restrictions.
Check out the poly counts from Crash Bandicoot on the Playstation 1
Compare the Playstation version of Crash Bandicoot to what Epic just tech demoed in Unreal.
All the polys
Now we are practically unrestrained by poly counts there is no reason not to be ‘softening’ up your scenes with organic objects.
I would suggest
Flowers and plants
Fabrics, cushions, and throws
Fur and hair.
Fur, in particular, is something people are not so used to seeing in CGI so you can expect to hear more ‘what that’s not a photo?’
Here’s a quick video showing how easy it is to start creating awesome fur.
3. Soften Edges With Maps
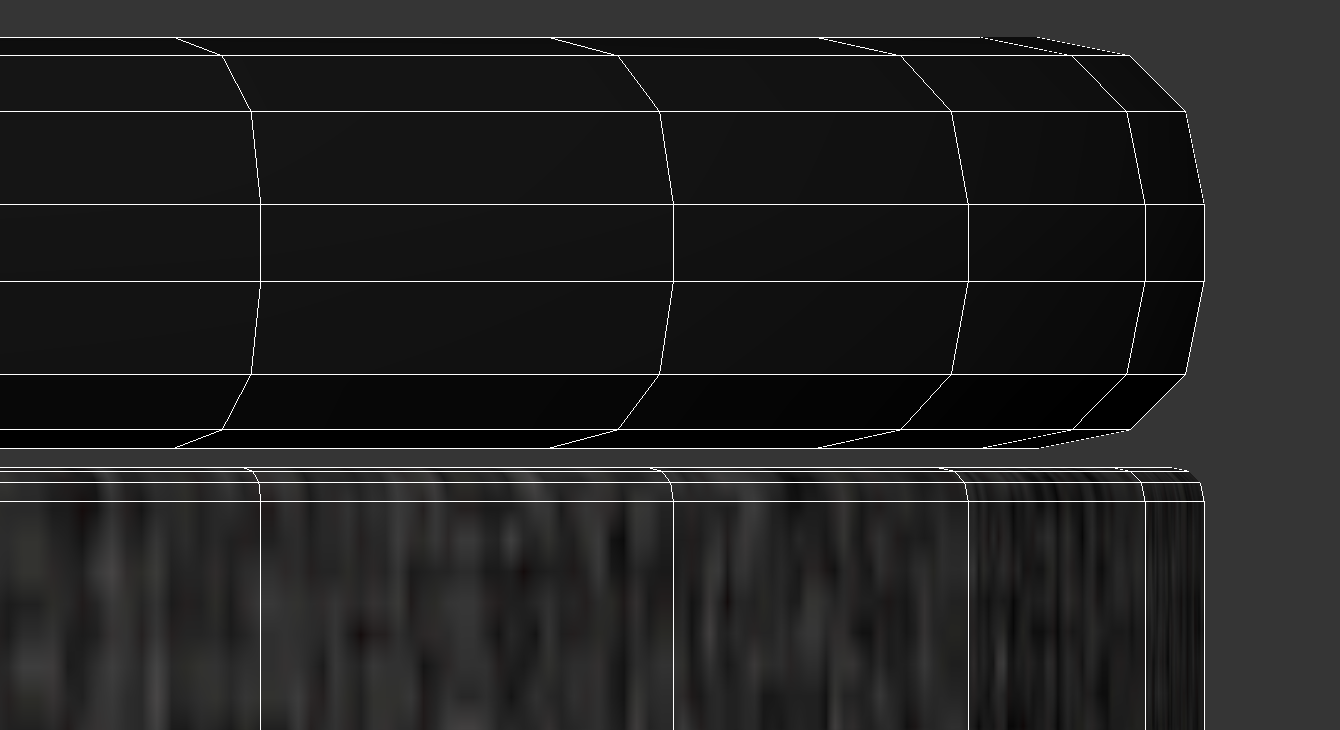
Talking of softening edges, chamfer has always been the go-to when trying to soften up those hard CG edges
Especially with Autodesk’s work over recent versions of 3ds Max on the Chamfer modifier. Which, with all jokes aside is so much better to use than within the editable poly. The modifier allows us to stack the Chamfer to update later on, rather than ‘baking’ it into the editable poly.
But…
There is an easier way. And that way is by using the Vray Edge Tex map. You can plug this map into the bump slot and it will ‘chamfer’ your edges. You can keep your current bump map as well by using a Vray Comp Texture.
Check out the video below on how to use the Vray Edge Tex Map to create soft edges.
4. Depth Of Field
Depth Of Field (DOF) can add so much to an image, I particularly like using depth of field on detail shots like below.
Image from Interior 3D Rendering with 3ds Max + V-Ray: The Quickest Way Course
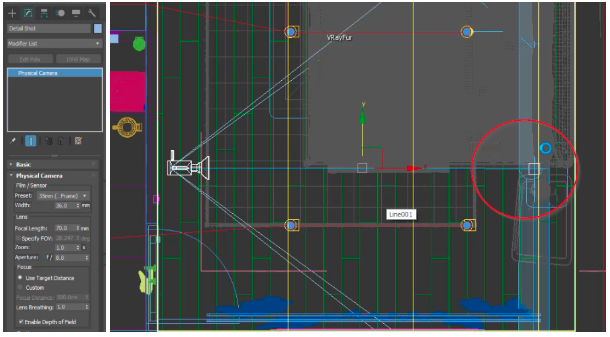
This is achieved pretty quickly by enabling Depth Of Field in the Physical camera and turning on Use Target Distance. Then all you need to do is place your camera target to where you’d like your image to be in focus.
3ds Max Physical Camera and Camera Target in Viewport
Here is a video of how I achieved the depth of field in the image above.
5. V-Ray Cloud
This changed everything for me. Since I went freelance and started traveling with my laptop render power has always been an issue for me. I have tried many render farms, but V-Ray Cloud is my new favorite.
I have found the upload speeds are second to none, I think this is because they use a VRScene file to upload it. I don’t know too much about the technical stuff involved here, what I do know is it works.
Here is how to install V-Ray Cloud and how to submit a render.
Your Next Steps ..
I hope you enjoyed this article and learned a thing or two .. :-)
If you feel like upgrading your “skills” you can check out the full V-Ray Interior Course.
If not, I hope you have enjoyed the article. If you have any suggestions for new articles, please put them in the comments below.
Render On!


